 "
"
Organizational Intranet with WordPress, Not Tried Yet?


So you want to create an organizational intranet with WordPress but don’t know how to do it? Well, you’ve landed at the right spot to know how, but first things first we’re an authentic source of Woffice resources.
Before we dive into how to create an organizational intranet with WordPress, let’s know what an intranet is and why you should use WordPress to build it.
What is an Intranet?
An intranet is a private network that is accessible only to limited users, which ensures privacy and security. Although anyone can create an intranet, it is usually created by organizations for internal use. Organizations create intranets to share information securely with the members and facilitate workplace communication.
Generally, organizations use intranets to streamline collaboration, information sharing, task delegation, reporting, and much more.
What is an Extranet?
Just like the intranet, an extranet is also a private network. However, it is accessible to authorized entities outside the organization. For example, an extranet created by an organization may be accessible to third parties like business partners, customers, suppliers, vendors, etc.
Businesses utilize extranets as an extension to their intranets for sharing sensitive information securely with third parties. It’s easy to build community websites for like-minded people or customers of a brand using extranets.
Top Reasons to Use WordPress to Build Your Organizational Intranet
There are several great reasons that advocate the use of WP for building an organizational intranet. Here are some of the top reasons:
- WP is the world’s leading CMS with more than 43% share of the CMS market share in March 2024. (source: ThemeIsle)
- WordPress is a free platform.
- WordPress supports thousands of themes and plugins, making it possible to customize not only the look and feel of intranet sites but also add custom features to them.
- The scalability of WordPress is yet another reason that makes it an apt choice for building organizational intranets. It allows businesses to build intranet sites with huge amounts of content and traffic without compromising speed and performance.
- Many WordPress themes are mobile responsive. By using such themes, organizations ensure that their intranets are easily accessible through mobile devices as well.
These are some of the most motivating reasons to leverage WordPress to build your intranet/extranet. Next, let’s know how exactly to create an intranet using the popular CMS.

Steps to Create an Organizational Intranet with WordPress
WordPress was not initially designed to support intranet platforms. However, over the years several plugins were released that effectively enabled WordPress to host fully functional intranets. At present, WordPress comes with features that enable you to build a highly secure and custom intranet for your organization.
Setting up an intranet for your organization using WordPress is easy if you follow the right approach. Here, we discuss all the key steps that will guide you through the creation of an intranet with WordPress.
Before getting started, you need to know that there are two different ways of setting up an intranet using WordPress, and they are as follows:
- By using an on-site server and hosting an intranet using a solution like XAMPP or WAMP.
- By hosting a WordPress website and configuring it using third-party plugins.
Among the two, the second method is more popular as it allows organizations to build intranets that are accessible from almost anywhere through the internet. On the other hand, when using a local server, the members of the organizations need to be on the same network to access the intranet.
Here, we will focus on the second method, i.e., setting up an intranet using plugins. So, let’s get started!
1. Install and Set Up WordPress on a Server
The very first task is to install WordPress on a public server acquired through a hosting platform. Additionally, you have to get a domain name that allows people in your organization to access the intranet through web browsers.
Before getting started with the installation, you need to choose between WordPress.com and WordPress.org as they are different platforms. For instance, WordPress.com is a hosted service and comes with several hosting plans. On the other hand, WordPress.org is a self-hosted platform that requires you to choose a third-party hosting platform for installing WordPress.
If you are wondering which one you should choose, we recommend WordPress.org as it allows better customization due to its support for all WordPress themes and plugins.
2. Install All-In-One Intranet Plugin
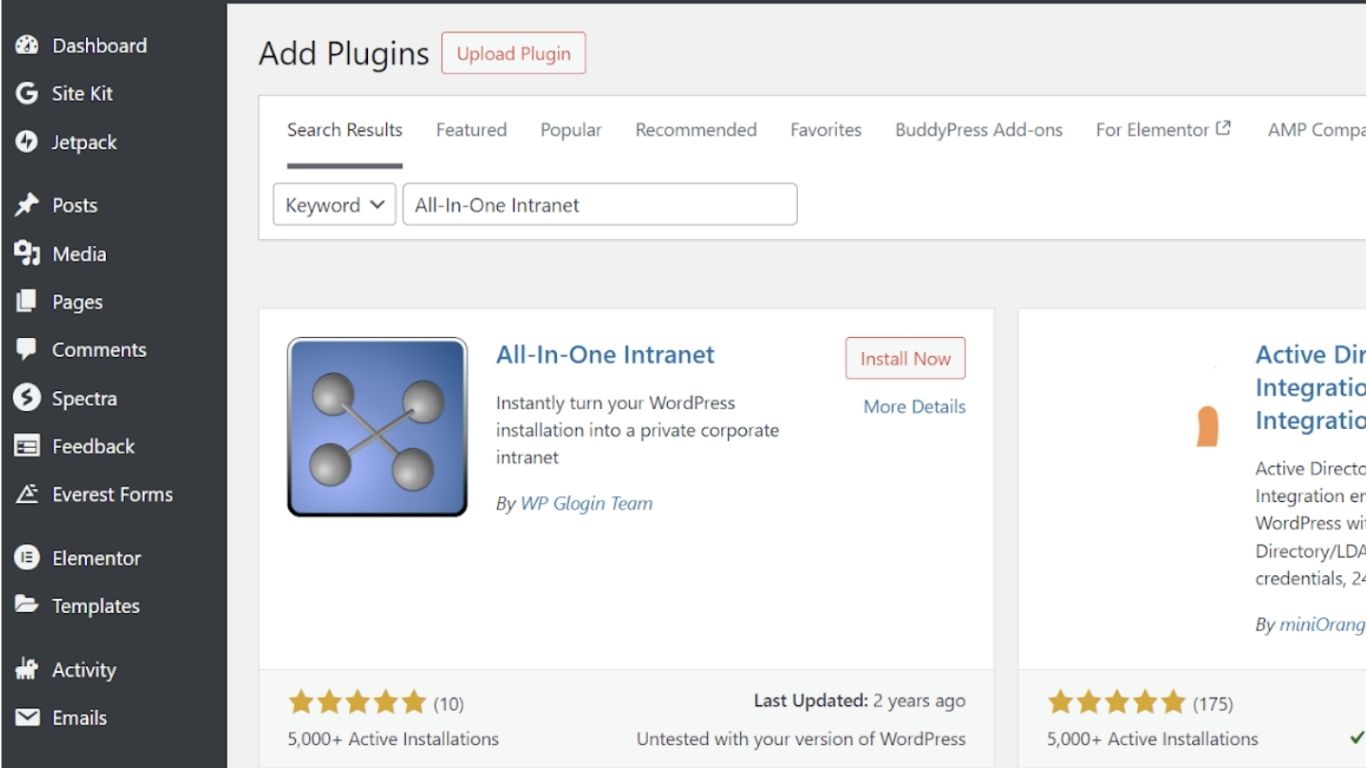
Once you have set up WordPress, the next thing you need to do is search for the All-In-One Intranet plugin and install it. To achieve this, you need to navigate to the Plugins section from your WordPress admin panel. There, you need to click on the Add New button. Next, in the search bar, type All-In-One Intranet, and you will see the plugin in the results shown.
Now, you simply need to click on the Install Now button to the right of the plugin tab to initiate the installation process.
After the successful installation, you will be able to see the Activate option. Click on it.

After the activation, you can configure the plugin by navigating to Settings and All-In-One Intranet from the WordPress Admin Panel.
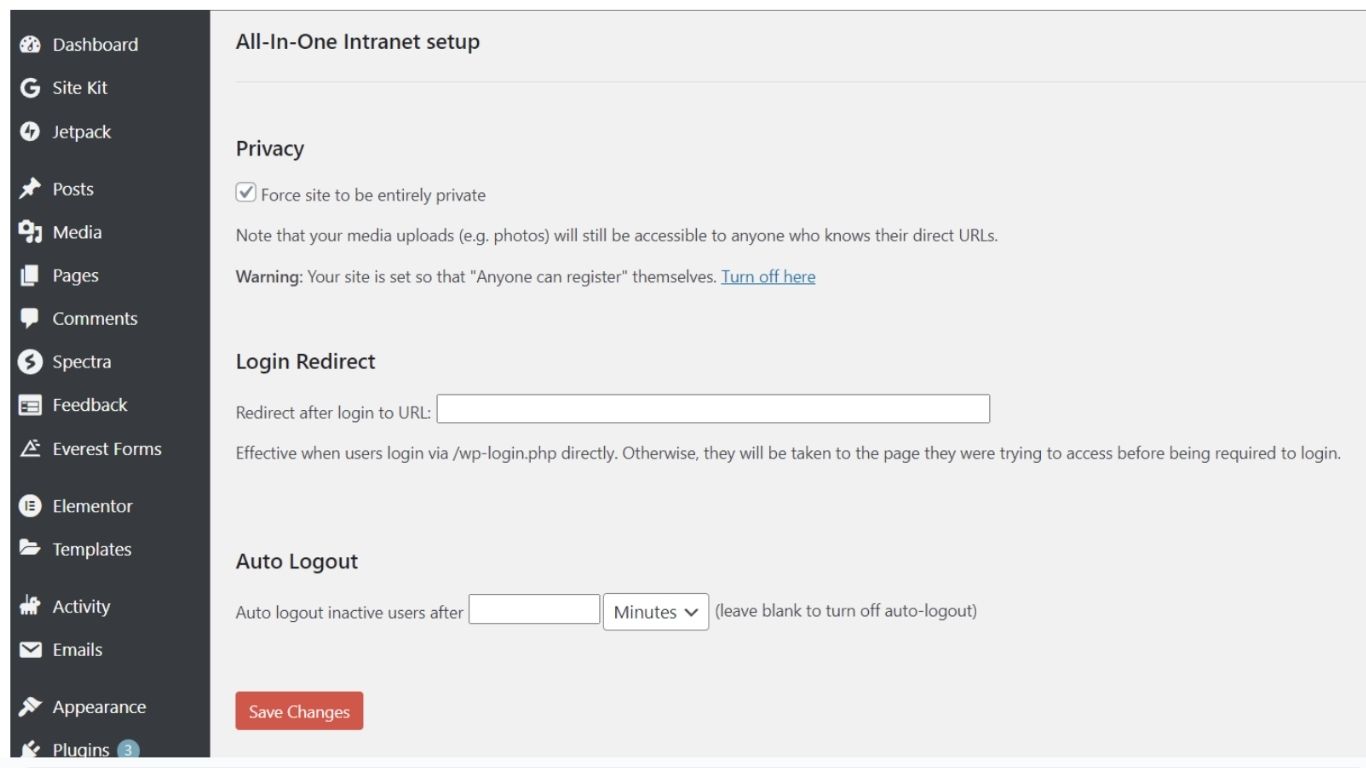
The first task for you is to enable the Force site to entirely private option available under the Privacy tab. By doing this, you will make your website private, and users will need a valid username and password to access the website.
Additionally, there are two other options in the settings, namely Login Redirect and Auto Logout that you can define as per your requirements.
Once you are done with the settings, click on the Save Changes button at the bottom of the settings screen.
3. Integrate BuddyPress Plugin with Your Intranet
BuddyPress is one of the most popular plugins that you can use to create a social network for your website. By integrating it into your intranet, you enable users on your website to create profiles, communicate with other users, create groups, and do much more.
To install the BuddyPress plugin, you need to navigate to the Plugins section in the Admin Panel one more time, click on the Add New button, search for BuddyPress, click on the Install Now button, and, lastly, click on the Activate Button.
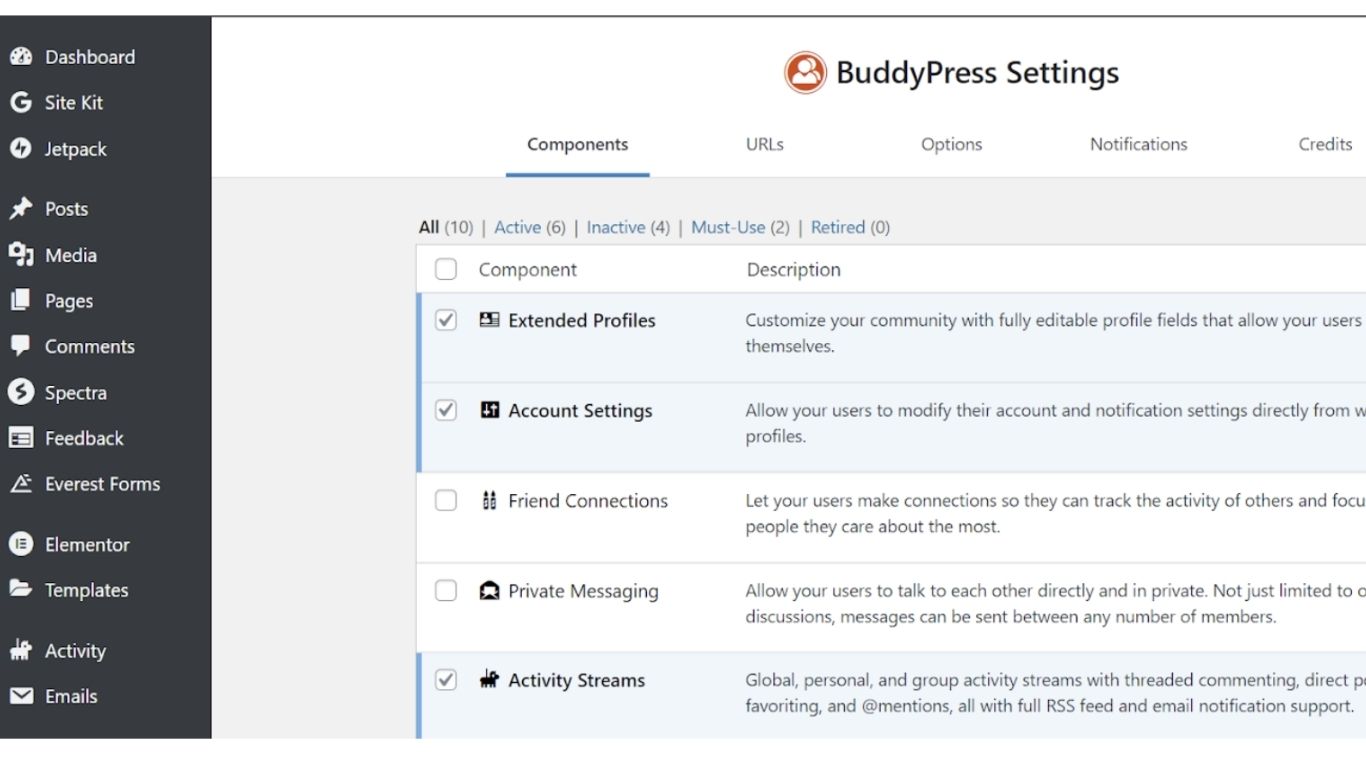
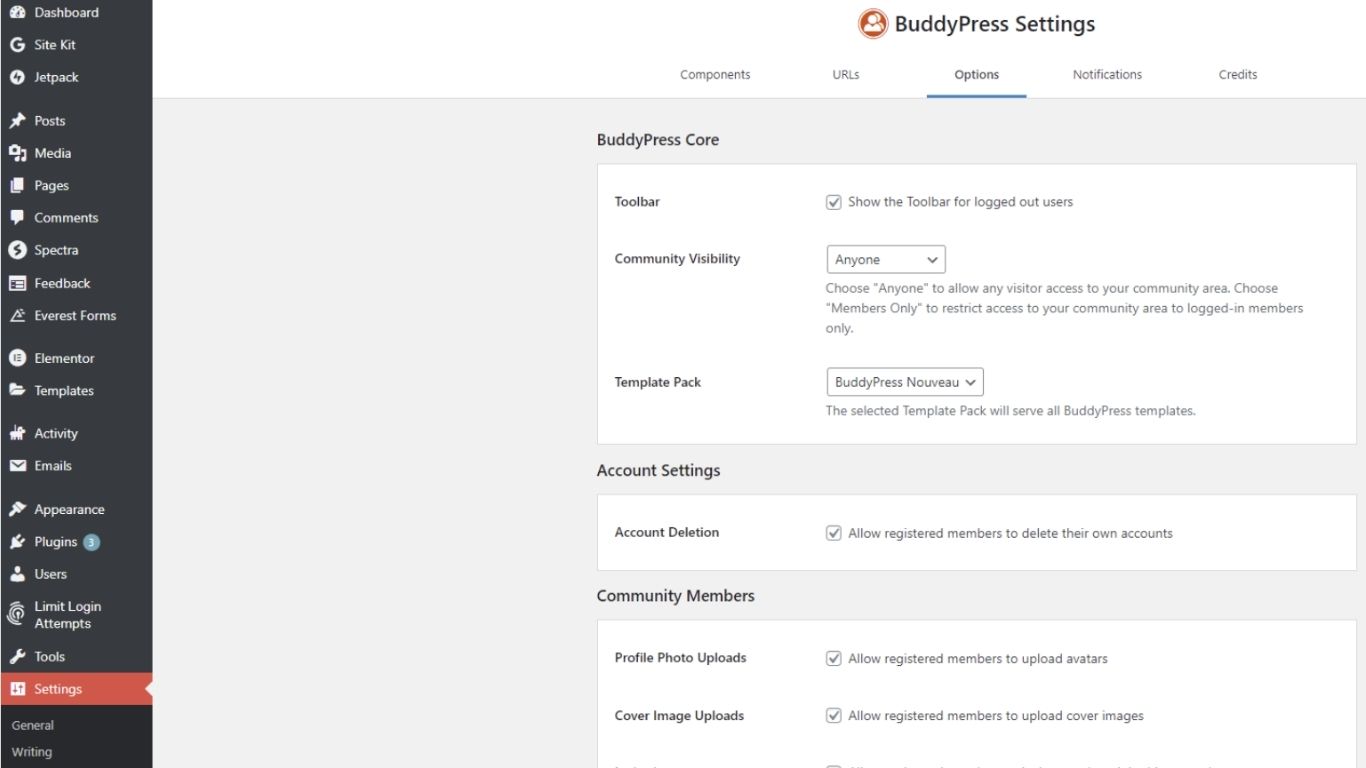
Now, to configure the BuddyPress plugin, you have to go to the Settings menu and click on BuddyPress. You will be able to see five setting tabs that allow you to customize the BuddyPress features you want in your intranet site. Here’s a brief description of each tab:
1. Components
Under Components settings, you choose the components of BuddyPress that you want on your website.
2. URLs
Here, you set directories to associate pages of your intranet site with BuddyPress elements. Under the URLs tab, if you are unable to find the Register and Activate option, you need to navigate to Settings and then to General.
There, you need to check the Anyone can register checkbox available under the Membership option. Afterward, go back to the BuddyPress settings to see the register and activate options under the Pages tab.

3. Options
In the Options tab, you can change settings related to user accounts, community members, activity stream, and so on.
4. Notifications
In this screen, you access any notifications related to the BuddyPress plugin installed on your WordPress site.
5. Credits
Under the Credits tab, you can view the people who contributed to the development of BuddyPress.
As soon as you finish with the configuration, you need to enable the display of the pages added with the BuddyPress plugin. To do this, you need to navigate to the Appearance section from the admin panel, and then navigate to the Menus section.
There, you need to create a new menu by entering the Menu Name and clicking on the Create Menu button. After that, you will be redirected to another screen where you will have to select the pages created with BuddyPress from the Add menu items section.
Finally, you need to enter the Add to Menu button and click the Save Menu button at the bottom right of the page. Now, you can see the added pages on your intranet site.
4. Customize Your Intranet by Installing Other WordPress Plugins
While your intranet site is up and running, you can customize and add more features to your website with other plugins. You can explore plugins in the WordPress store. Here are some of the most popular plugins for intranet sites that are worth checking out:
- Gravity Forms
- EventON
- Paid Membership Subscriptions
- ProfileGrid
- Task Manager Pro
Opting for a WordPress Intranet/Extranet Theme – Woffice
While WordPress lets you use plugins to create and customize an intranet site, you may have to explore and install lots of plugins to add different functionality.
However, there are some dedicated company intranet website templates and themes in WordPress that will make the process of setting up an intranet site much easier. Among such WordPress themes is Woffice, which is an enterprise intranet theme known for its versatility.
The main advantage of using Woffice is that it not only allows you to set up an intranet easily but comes with several useful features. Let’s take a quick look at some of them below:
1. Customizable Dashboard
A visually attractive dashboard with custom widgets allows administrators to get all the essential information of their intranet in one single place.
2. Project Management
Woffice makes project management easier and more effective for organizations by offering project management add-ons.
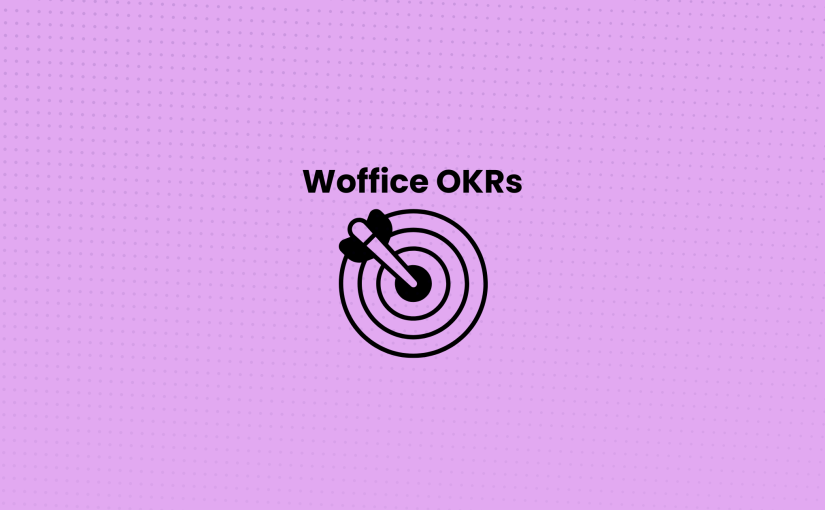
By opting for these add-ons, organizations equip their intranets with several capabilities, such as setting goals with OKRs and Kanban boards, task management, and advanced reporting. Consequently, Woffice has emerged as a top project management WordPress theme for organizations.
3. Wiki
Building an intranet with Woffice facilitates the creation of a Wiki for the organization’s members or employees. Moreover, multi-language support and extended search ensure members get information in their preferred languages and search for desired information quickly.
4. AI Integration
The integration of the OpenAI models in Woffice makes it possible to generate text content as well as images. Additionally, you can create project titles, descriptions, and even to-dos effortlessly using integrated artificial intelligence.
Overall, Woffice comes with lots of tools and features at a reasonable price. Also, you don’t have to juggle between multiple tools to manage your intranet site and your team and projects.
5. Calendar
A built-in calendar in Woffice lets you visualize all the important upcoming events. You can take advantage of the full-month calendar view to see what’s scheduled ahead.
You can also integrate the EventON plugin to access more advanced calendar features and make sure you always stay on track.
6. Directory
Woffice comes with a directory extension that adds directory-like functionality to your intranet/extranet website.
The extension allows you to transform your site into a directory, thus allowing users to browse content effortlessly.
7. Team Management
Along with managing projects, Woffice facilitates team management with its dedicated team management add-ons.
Start one-on-one communication, create action items, and take private and general notes to streamline collaboration.
Compared to intranet plugins available in WordPress, like All-In-One Intranet, Woffice is a much better choice for many reasons. Firstly, setting up an intranet/extranet is much easier with Woffice. You do not have to configure different plugins to convert your website into an intranet/extranet. Secondly, Woffice comes loaded with several advanced features and even offers add-ons to expand the functionality of your intranet/extranet site.
To Sum it Up All
Setting up an intranet or extranet becomes quite easy with WordPress. With WordPress, you also get the option to choose templates and themes that make the task of setting up an intranet or extranet quite straightforward. Woffice is one such intranet theme for office employees and organizations with which you create and customize your intranet site. Moreover, it has several features that will elevate your experience of managing intranets.
You can try the Woffice intranet theme today to streamline communication, project management, task management, and much more.
Comments 1
Comments are closed.